 Ultimate guide
How Do You Install a Retaining Wall on a Steep Backyard?
Last Updated: October 26, 2026
Quick Summary
Install a retaining wall on steep backyards by first assessing the site, then compacting a stepped base trench, and building the wall course by course. Pair it with a proper drainage system behind the wall to prevent hydrostatic pressure from causing slumping or bulging.
- Most failures trace back to poor site assessment, weak base compaction, or inadequate drainage.
- Use 20-40 mm free-draining aggregate in a column at least 300 mm wide behind the wall.
- Wrap the drainage aggregate in geotextile filter fabric with overlaps of at least 300 mm.
- Place a perforated base drain pipe with a minimum fall of about 1% to a lawful outlet.
- Intercept surface water from uphill before it reaches the backfill.
Table of Contents
- Why Steep Backyards Need a Retaining Wall Built Differently
- Retaining Wall Ideas for Sloped Backyards and How to Choose a Design
- Site Assessment, Soil Testing and Planning Your Levels
- Retaining Wall Blocks Installation: Excavation, Base Trench and Stepping Up the Slope
- Retaining Wall Drainage Solutions That Stop Failure
- Retaining Wall Cost for a Steep Backyard and How to Budget for It
- When to Engage an Engineer and Plan Your Next Step with AK Fencing
- Frequently Asked Questions
How do you install a retaining wall on steep backyards without it slumping, bulging or failing after the first wet season? The short answer is that the wall is the easy part. Most failures trace back to what happens before the first block goes down: poor site assessment, a base that was never properly compacted, and drainage that was treated as an afterthought.
Why Steep Backyards Need a Retaining Wall Built Differently
A steep backyard places far more lateral pressure on a wall than a gently sloping block does. Soil behind the wall pushes outward constantly, and that pressure grows with height, moisture content and any surcharge sitting on the slope.
Many homeowners assume that a heavier block or a deeper footing solves the problem. Often it does not. The bigger risks are water building up behind the wall and a base that settles unevenly.
Retaining Wall Ideas for Sloped Backyards and How to Choose a Design
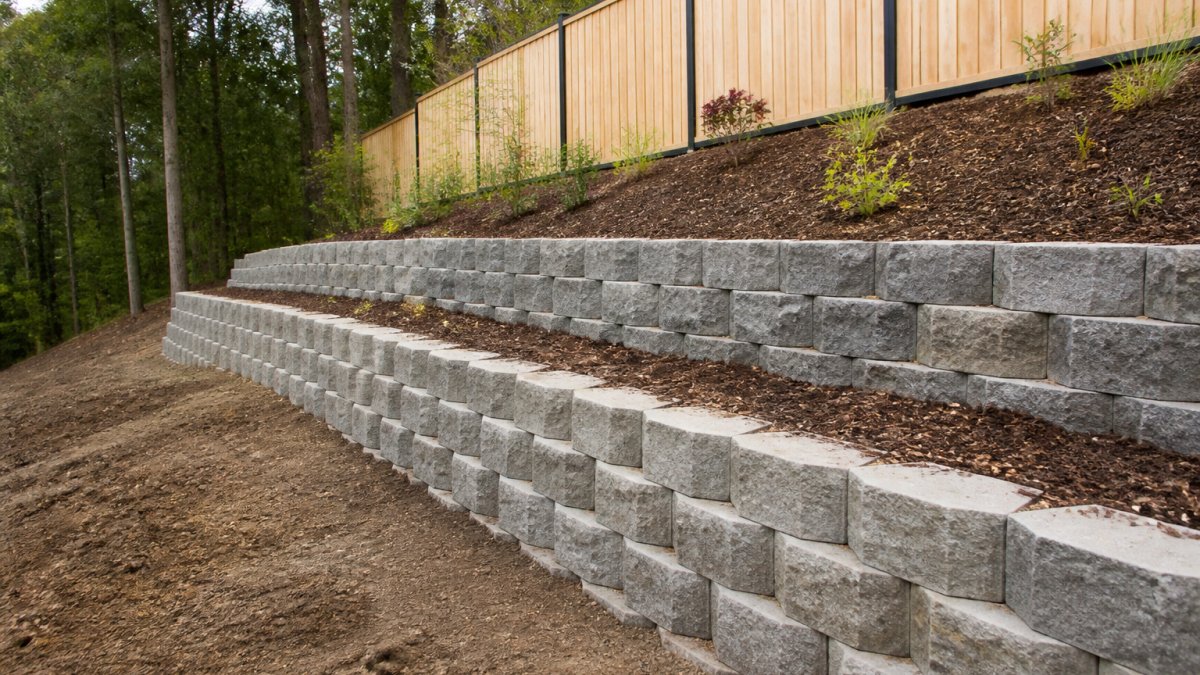
Design choices shape both appearance and performance. A single tall wall concentrates load at one point, while a tiered arrangement of lower walls spreads it across several structures, each with its own base and drainage.
Common materials include:
- Concrete block: Strong, consistent and well suited to engineered heights, but it needs proper reinforcement and drainage.
- Natural stone: Attractive and durable, though irregular shapes make a stable, level build harder to achieve.
- Timber sleepers: Lower cost and a softer look, with a shorter lifespan and more sensitivity to moisture.
When you choose a design, consider the wall height, the soil type, the available access for machinery and how much level space you want to gain.
Site Assessment, Soil Testing and Planning Your Levels
Before excavating, assess the slope itself. If you are unsure whether an existing wall is already under stress, review the warning signs of a failing retaining wall first.
Soil matters just as much. Clay holds water and swells, while sandy soils drain quickly but can erode.
Plan your levels on paper before work starts. Mark the top and bottom of the wall, the step-up points for each course and the finished grades on either side.
Retaining Wall Blocks Installation: Excavation, Base Trench and Stepping Up the Slope
Begin by excavating a base trench deep enough to hold a compacted base course, typically a layer of road base or crushed rock.
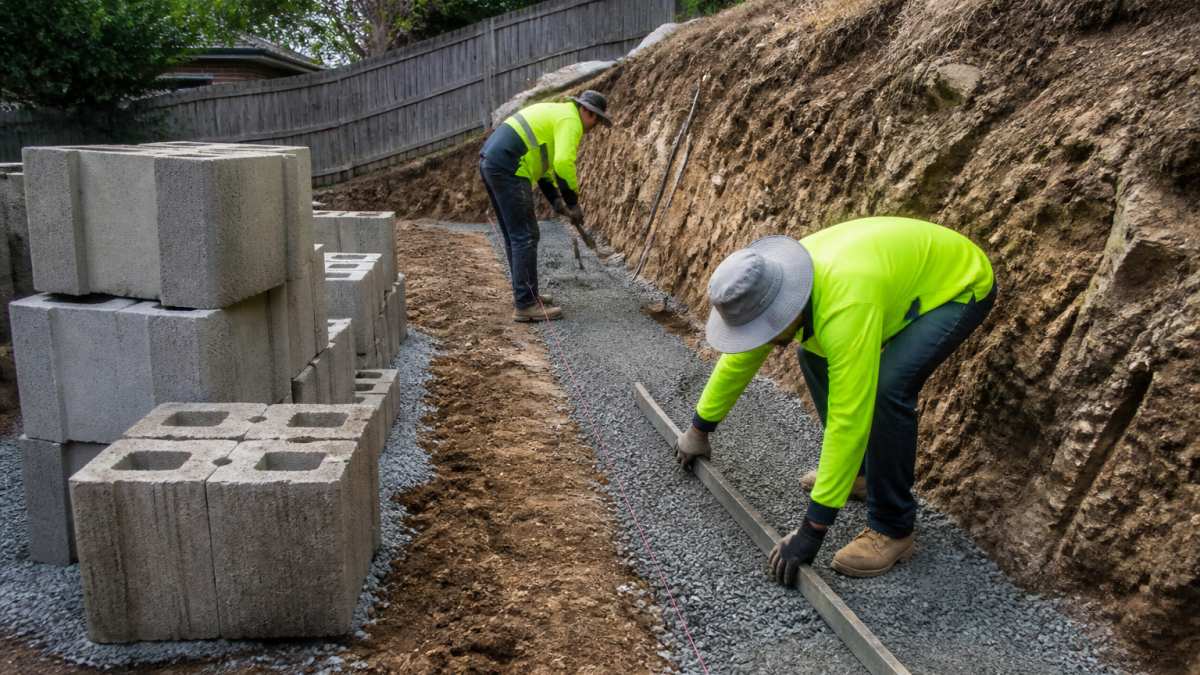
Compact the base in layers. A poorly compacted base is the most common cause of settlement, and it is difficult to correct once blocks are in place.
Lay the first course carefully, because every course above depends on it.
Retaining Wall Drainage Solutions That Stop Failure
Drainage is where most steep-site walls succeed or fail. Water that cannot escape builds hydrostatic pressure behind the wall, and that pressure is far stronger than soil pressure alone. A wall designed to resist soil loads can bulge or collapse once it is saturated.
A complete drainage system has four jobs: collect water at the base, filter out fines so the drain keeps working, carry water to a safe outlet, and stop surface water entering the backfill in the first place. Miss any one of these and the others underperform.
The drainage layer behind the wall
Use a free-draining aggregate in the zone directly behind the wall, typically 20-40 mm crushed rock or washed river gravel, placed in a column at least 300 mm wide against the back of the wall and extending from the base drain up to within about 150-300 mm of the finished top. Do not use the native clay or silty soil as backfill in this zone; it holds water and transmits hydrostatic pressure straight to the wall.
The base drain and pipe sizing
Place a perforated agricultural drain pipe (commonly 100 mm diameter for residential walls, slotted and wrapped or sleeved in geotextile) at the base of the wall, sitting on or just above the footing and surrounded by the drainage aggregate. The pipe must fall continuously to an outlet, a minimum grade of about 1 in 100 (1%) is a common practical target, and flatter than that risks silting.
The outlet is part of the design
Plan the outlet before you build. Water has to go somewhere lawful and sensible: a stormwater connection, a charged system, a vegetated discharge area, or a level spreader, not over a neighbour's boundary, not onto a driveway that drains into a garage, and not pooling at the toe of the slope. On steep sites the outlet is often the hardest part, because the wall base may sit well below the street or stormwater line.
Surface water diversion above the wall
Most of the water that reaches a retaining wall on a steep block arrives from uphill. Intercept it before it reaches the backfill: a graded swale, a low retaining kerb, or a surface drain set at least a metre or two above the top of the wall, directed to a lawful outlet. Grade the ground above the wall so it falls away from the top edge rather than toward it, and avoid planting or paving that directs runoff into the wall line.
What good drainage looks like in practice
A well-drained steep-site wall shows no standing water behind the top course after heavy rain, no damp patches or efflorescence on the face, and no movement at the base. If you see water weeping from the wall face, silt in the drain outlet, or soft ground at the toe, the system is not working and should be investigated before the wall shows structural signs.
Retaining Wall Cost for a Steep Backyard and How to Budget for It
Cost is where steep-site projects most often go wrong, because the drivers are different from a flat yard and the quote you receive may not itemise them. Rather than quote a single rate that would be misleading, it is more useful to understand what moves the price and how to read a quotation.
The cost drivers on a steep block
- Wall height and tiering. Pressure rises with height, so a 1.2 m wall is not simply twice the cost of a 600 mm wall, it may need engineering, a larger base, and heavier sections. Tiering into two or three lower walls can reduce structural demand per wall but adds excavation, drainage runs, and separate footings.
- Excavation and rock. Steep sites often require benching into the slope, and rock or shale can turn a day of machine work into several. Ask whether the quote allows for rock and how variations are priced.
- Access. If a machine cannot reach the wall line, excavation and material handling become manual, and the labour component rises sharply. Narrow side access, steps, pools, and established gardens all add cost.
How to read a quotation
Ask for a written quotation that itemises, at minimum: site preparation and excavation, base course and compaction, wall materials and reinforcement, drainage aggregate and pipe, filter fabric, backfill, outlet works, and any engineering or approval fees. A single lump sum makes it impossible to compare quotes or to see where a cheap quote has left something out. Ask what is excluded, rock, disposal of spoil, access works, revegetation, and how variations will be priced.
Budgeting approach
Rather than a rate per square metre, build your budget from quantities: wall face area, volume of excavation, length of drain, volume of drainage aggregate, and the number of tiers. Add a contingency for rock and access, because these are the two items most likely to change once work starts.
Pricing depends on the project, so request a quote for your specific slope. To benchmark your budget against local work, see the Melbourne fencing cost guide.
The main cost drivers on a steep block are summarised below.
| Cost driver | Why it matters | What to check |
|---|---|---|
| Wall height and tiering | Pressure rises with height, so tall walls need engineering and heavier sections | Ask whether tiering is quoted and how each wall is engineered |
| Excavation and rock | Rock or shale can turn one day of machine work into several | Confirm whether the quote allows for rock and how variations are priced |
| Access | Limited machine access makes excavation and material handling manual | Note narrow side access, steps, pools and gardens |
| Drainage | Aggregate, geotextile, perforated pipe and outlet works are real line items | Check the quote includes them, not just the wall |
| Engineering and approval | Tall walls, boundary walls and surcharge loads commonly need engineering and council approval | Ask who pays for engineering and approval fees |
| Material choice | Installed cost depends on base and drainage, not only the block price | Compare installed outcomes, not material prices alone |
When to Engage an Engineer and Plan Your Next Step with AK Fencing
An engineer is worth involving when a wall is tall, sits close to a boundary or building, is supporting a driveway or structure, or stands on poor or unknown soil. Certain heights and site conditions also require approval, so check with your local council before excavating. Engineering input protects you, the people using the space below the wall and any future buyer of the property.
If you are planning a wall on a steep yard, start by reviewing the warning signs of an existing or failing structure, so you can judge whether the site needs remediation before new work begins. Our fully licensed and insured team stands behind every installation with a workmanship guarantee, and you can get started with a free, obligation-free quote. Request a quote for your steep backyard project using our online form.
Frequently Asked Questions
What slope needs a retaining wall?
A retaining wall is usually needed where the ground rises or falls steeply enough that soil cannot hold its own angle, or where you want to create level usable space. Many steep backyards with noticeable slope, visible soil movement or erosion benefit from a wall. Because the threshold depends on soil type, moisture and loads above the slope, check your site before deciding. For walls over about one metre or on difficult ground, have a structural engineer confirm the design and required footing.
What are the common mistakes to avoid when installing retaining wall blocks?
The most frequent errors are skipping or under-compacting the base, laying the first course unlevel, failing to set blocks back into the slope, and omitting drainage behind the wall. Many failures trace back to poor drainage causing hydrostatic pressure. Stepping the base up the slope in short, level sections rather than forcing a single level course also prevents misalignment. Checking level and batter at every course keeps the wall stable as it rises.
How can you build a low-cost retaining wall for a steep backyard?
Lower-cost options include shorter stepped walls rather than one tall wall, using concrete blocks instead of natural stone, and doing site preparation and excavation yourself while hiring a professional for engineering and structural work. Keeping the wall height modest reduces the amount of backfill, drainage aggregate and reinforcement required. Be cautious with cutting corners on base preparation and drainage, as these are where savings most often lead to costly repairs later.
When should a retaining wall be engineered?
A retaining wall should generally be engineered where it is tall, sits on a steep or unstable slope, supports a driveway or structure, or is near a boundary or pool. Soft or reactive soils and any surcharge loads from fences, vehicles or buildings also call for engineering input. Engineering confirms footing depth, reinforcement and drainage design. Your local council may also require approval for walls above a certain height, so check with them before construction.
Is it better to build one tall retaining wall or several smaller terraces?
On a steep backyard, several smaller terraced walls are often more stable and easier to build than one tall wall. Each lower wall carries less soil pressure, drainage is easier to manage in tiers, and the work can be staged over time. A single tall wall can create more lateral pressure at its base and needs more engineering. Terraces also create planting and usable areas along the slope, although they take up more horizontal space.
How do I know the retaining wall installation won't end up costing more than quoted?
AK Fencing provides transparent, obligation-free quotes with no hidden costs. Contact AK Fencing VIC Pty Ltd for a quote specific to your property.
Will AK Fencing support my retaining wall after installation?
AK Fencing VIC Pty Ltd is a fully licensed and insured business that offers a workmanship guarantee on all installations.